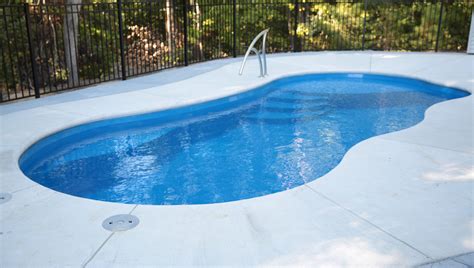

Introduction
Installing an inground pool can be an exciting addition to your backyard, providing a refreshing oasis for you and your family to enjoy during the hot summer months. However, the process of installing an inground pool can be complex. In this article, we will outline the step-by-step process of inground pool installation to help guide you through the process.
Step 1: Design and Planning
The first step in inground pool installation is to design and plan your pool. This involves determining the size, shape, and location of your pool, as well as considering any additional features such as a diving board or water slide. It is important to work with a professional pool designer who can help you create a customized pool design that meets your specific needs and preferences.
Step 2: Excavation
Once the design and planning phase is complete, the next step is excavation. This involves digging a hole in your backyard to the specified dimensions of your pool. The excavation process requires heavy machinery and careful precision to ensure the hole is dug accurately and to the proper depth. It is important to hire a professional excavation company with experience in pool installations to ensure this step is done correctly.
Step 3: Plumbing and Electrical Work
After the excavation is complete, the next step is to install the plumbing and electrical systems for your pool. This includes the installation of pipes, filters, pumps, and electrical wiring. It is important to hire a licensed plumber and electrician to ensure that the systems are installed safely and in compliance with local building codes.
Step 4: Pool Shell Installation
Once the plumbing and electrical work is complete, the next step is to install the pool shell. This involves constructing the walls and floor of the pool using either concrete, fiberglass, or vinyl. The choice of pool shell material will depend on your personal preference and budget. It is important to hire a professional pool builder who is experienced in working with the chosen material to ensure a high-quality installation.
Step 5: Pool Deck and Surroundings
After the pool shell is installed, the next step is to create the pool deck and surrounding area. This may involve pouring concrete, laying pavers, or installing decking materials. It is important to choose materials that are durable, slip-resistant, and able to withstand exposure to water and sunlight. Additionally, landscaping and fencing should be considered to enhance the aesthetic appeal and safety of your pool area.
Step 6: Pool Finishing Touches
The final step in inground pool installation is to add the finishing touches. This includes filling the pool with water, adding any desired features such as a pool heater or lighting, and conducting a thorough inspection to ensure everything is functioning properly. It is important to follow the manufacturer’s instructions for filling and maintaining your pool to ensure its longevity and optimal performance.
By following these steps, you can successfully install an inground pool in your backyard. Remember to consult with professionals throughout the process to ensure a safe and efficient installation. Now, it’s time to grab your swimsuit and enjoy your new pool!

