Introduction
Fiberglass pools have become increasingly popular in recent years due to their durability, low maintenance, and aesthetic appeal. If you’re planning to install a fiberglass pool in your backyard, it’s essential to understand the installation process to ensure a smooth and successful project. In this article, we will discuss the step-by-step guide for fiberglass pool installation in 2023.
Step 1: Site Preparation
The first step in fiberglass pool installation is to prepare the site. This involves clearing the area of any debris, rocks, or vegetation that may interfere with the pool’s placement. The ground should be leveled and compacted to provide a stable base for the pool. It’s crucial to consult with a professional to determine the ideal location and ensure the site meets all necessary requirements.
Step 2: Excavation
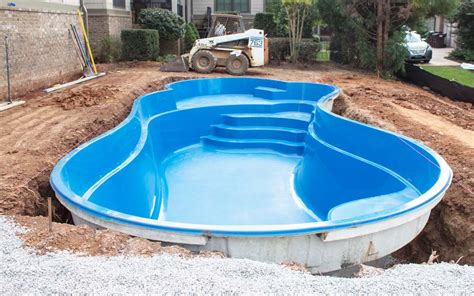
Once the site is prepared, the next step is excavation. A professional contractor will carefully dig the hole according to the pool’s dimensions and shape. The depth of the hole will depend on the pool’s design and local building codes. Excavation should be done with precision to avoid any damage to underground utilities or structures.
Step 3: Pool Delivery and Placement
After the excavation is complete, the fiberglass pool will be delivered to your site. It’s crucial to ensure there is enough access for the delivery truck to reach the designated area. With the help of specialized equipment, the pool will be carefully placed into the excavated hole. The pool’s position will be adjusted to ensure proper alignment and levelness.
Step 4: Backfilling and Plumbing
Once the pool is in place, the next step is backfilling. This involves filling the space around the pool with a mixture of sand and gravel. The backfill material should be carefully compacted to provide stability and prevent any shifting or settling. At the same time, the plumbing system will be installed, connecting the pool to the filtration system, pumps, and other necessary components.
Step 5: Deck and Surroundings
After the pool is backfilled and the plumbing is in place, attention can be turned to the deck and surrounding area. The deck can be constructed using various materials, such as concrete, pavers, or wood, depending on your preference and budget. It’s essential to ensure the deck is built to code and provides a safe and functional space around the pool. Landscaping and other additional features can also be incorporated to enhance the overall aesthetics.
Step 6: Final Touches and Testing
Once the deck and surroundings are complete, the final touches can be added. This may include installing safety features such as fences or gates, adding lighting, and applying finishes to the pool’s surface. A professional will also conduct thorough testing to ensure the pool is functioning correctly and all components are working as intended. Water will be added, and chemical balances will be adjusted to create the perfect swimming environment.

